Open your company file and make sure to take a backup of company file from QuickBooks.
It is important to take a backup of your company file so your previous data remains undisturbed.
Please note that sync is an IRREVERSIBLE action, so follow all the below mentioned steps one by one carefully.
STEP 1 - Download and Install sync utility.
-Open QuickBooks Desktop Version
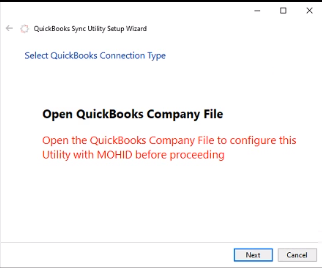
-Keep your company file opened in the background after taking the backup
-Download and install the sync utility from the provided link
-Run Quick Book Sync Utility
-Click next
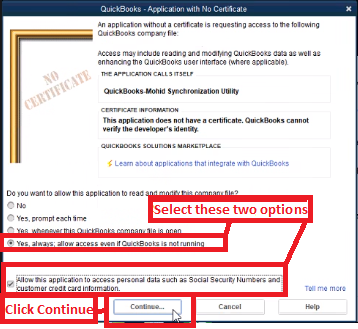
Quick Book sync Utility will be integrated with the QuickBooks company file.
>Click Continue
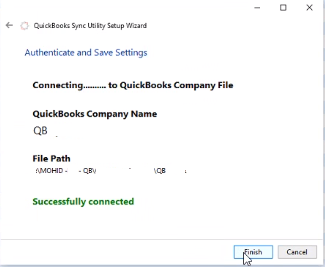
>Click Finish
Please obtain Masjid Key from Mohid by following below steps:
>Go to Settings
>Click General Information
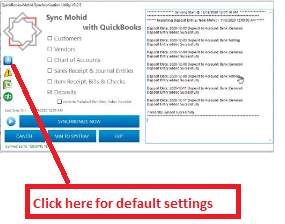
Now click on default setting icon on the left side of the utility.
Please select the default accounts from the dropdown under each account
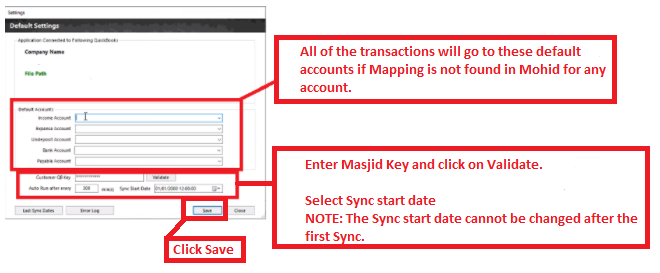
Select the sync start date,
>Click Save.
>Click Close.
The utility will restart and save the settings.
STEP 2 - ACCOUNT MAPPING
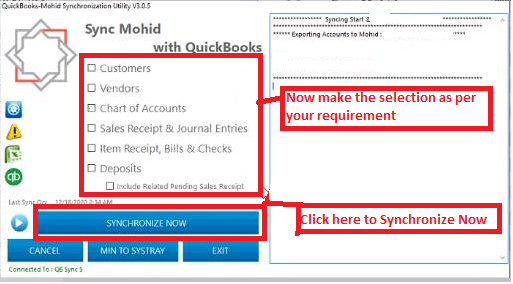
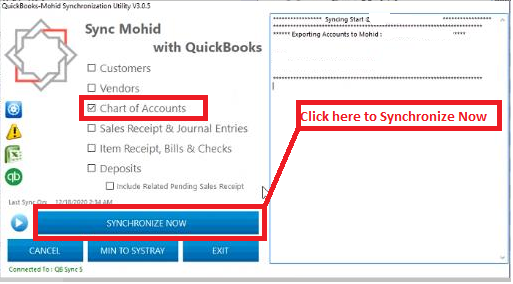
Select only Chart of Accounts to export accounts from QuickBooks to MOHID
Now press synchronize now.
After the accounts are synced, please make sure all of your accounts are properly mapped in MOHID before running the sync utility otherwise the transactions will be synced to the default accounts which were setup in above step.
In order to check your Account mapping, please go to
-Mohid Admin Dashboard> Financials> COA> List All Accounts.
-Click on three dots (...) displayed for each account.
-Select your required account for account mapping
-Click save, Your mapped account should appear in green color.
Please make sure to complete above steps for each account to be successfully and correctly mapped.
Once the transactions are synced the action is IRREVERSIBLE.
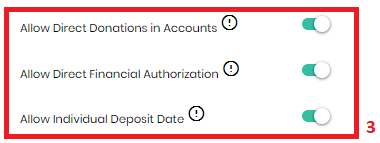
STEP 3 - OVERRIDE SETTINGS
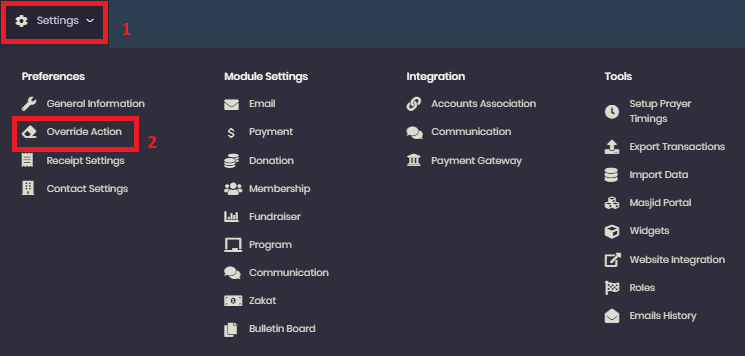
Please go to Settings> Override Action >
- "Allow Direct Donations in Accounts" should be enabled (It will automatically approve donation transactions (bypass Financial Management approval) and send them to Deposit section)
- "Allow Direct Financial Authorization" should be enabled (It will automatically approve Journal transactions (bypass Financial Management approval) and post them to corresponding accounts.
- "Allow Individual Deposit Date" should be enabled
Click Save button.

STEP 4 - DEPOSIT PENDING SALES RECEIPTS
STEP 5 - RUN THE SYNC UTILITY
After the account mapping is done, please follow below mentioned steps to run the sync utility.
It is recommended to select ONE option at a time for sync.
Please note that the sync will take time to complete, DO NOT end the process before sync is completed.