
Important :
Before installing the EMV upgrade Kit, please make sure that you have upgraded your KIOSK to the provided version in email and you have an approved WorldNet Payment processing account
Use the following link for instructions.
Step 1:
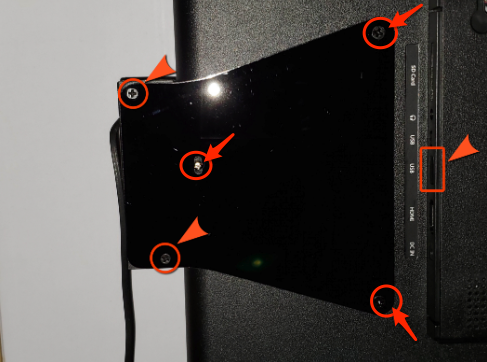
- Remove the existing plastic Base Plate and Magnetic Strip Card Reader from KIOSK
- Remove the 5 screws mentioned in the picture below to detach the card reader and the base plate
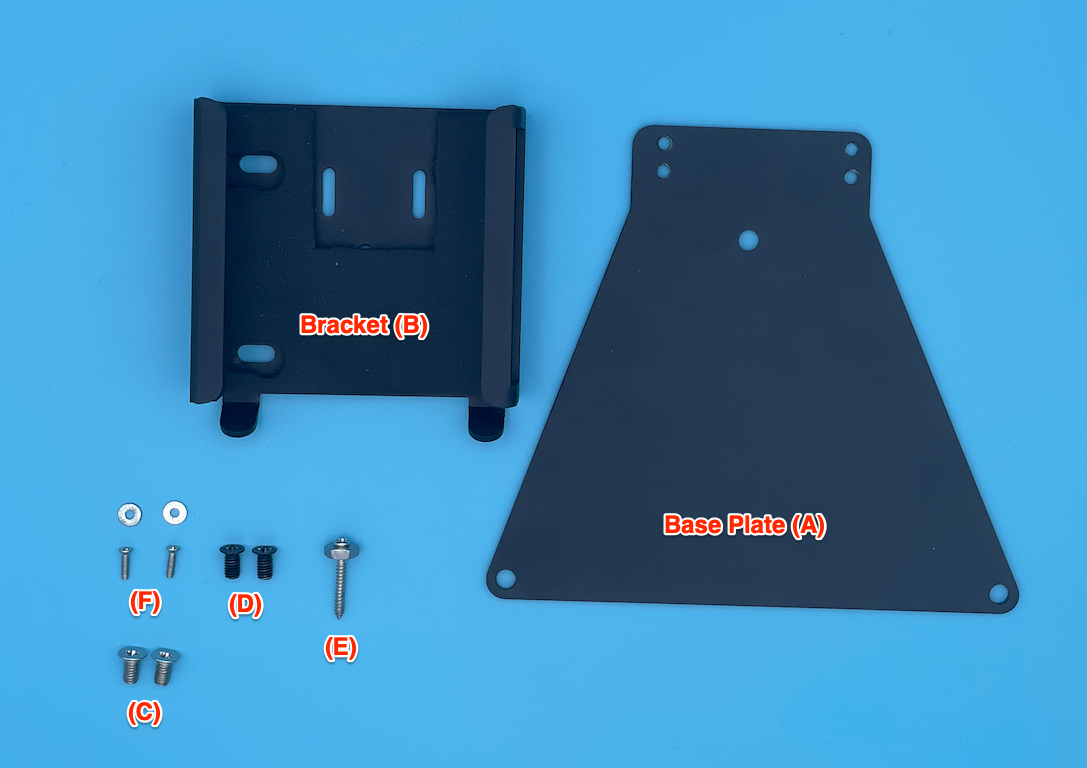
Step 2:
- Check the contents of the Upgrade Kit for all the parts shown in the figure.
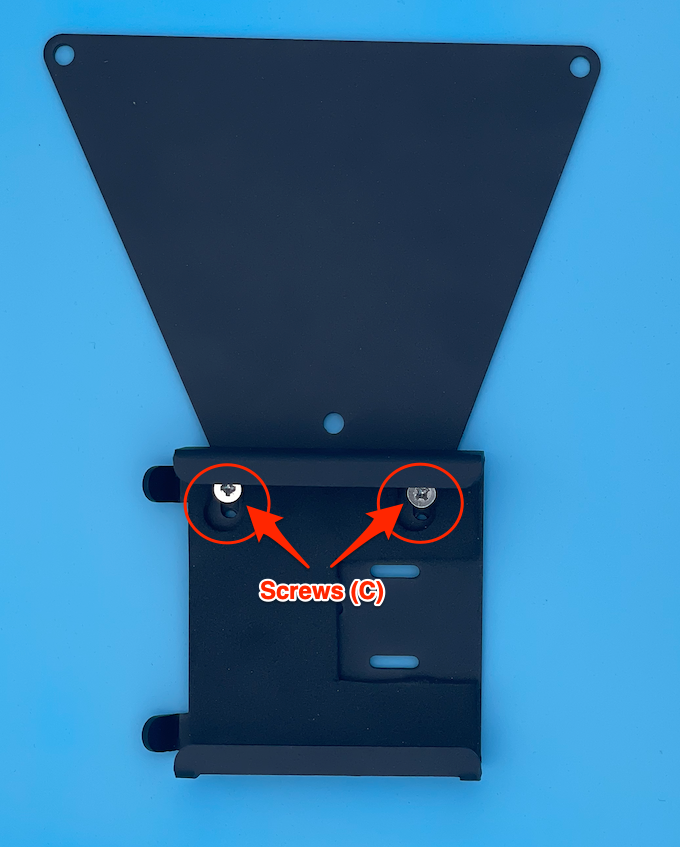
Step 3:
- Install the Bracket (B) with the Metal Base Plate (A) using 2 screws (C)
- Important: Do not tighten the screws at this time , keep them loose to adjust bracket later
- There are 2 holes in base plate (A), you can use any of them to attach the Bracket (B).
- Make sure to use same holes to keep the bracket straight when installed
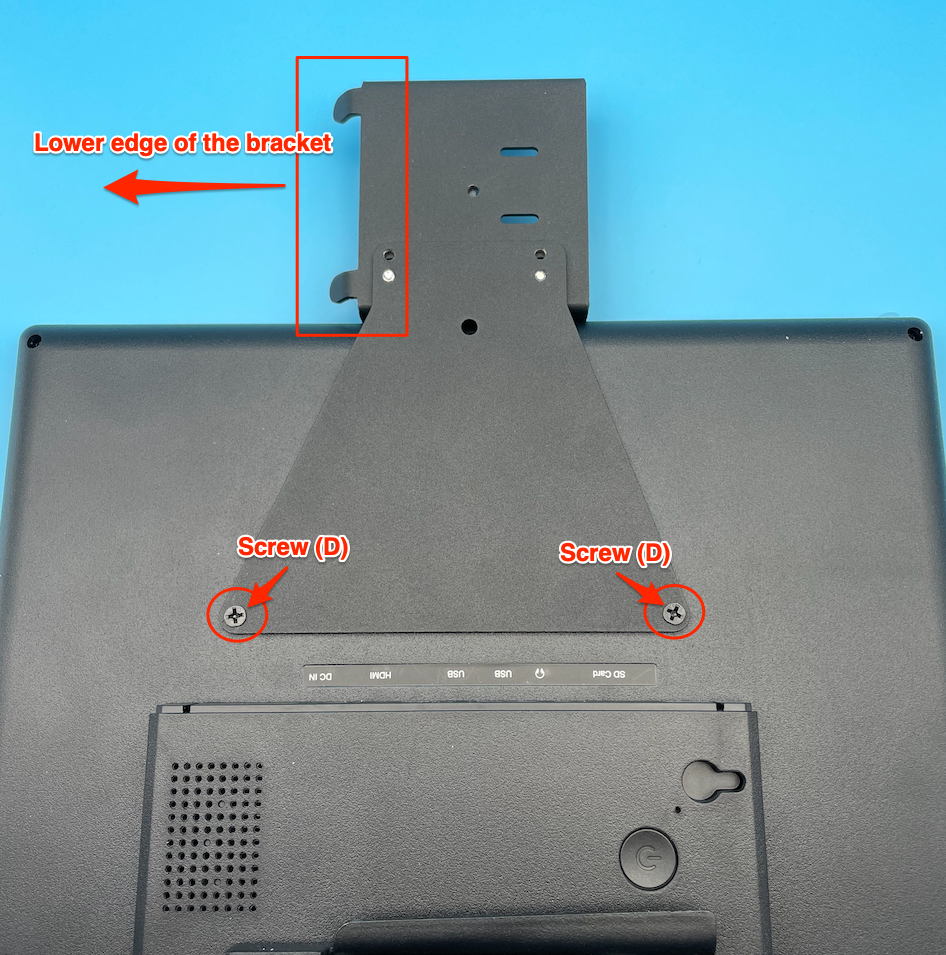
Step 4:
- Place the KIOSK on a flat surface with the screen facing down (put a cloth or soft material to safe the screen)
- Put the Base Plate (A) on the back side of the KIOSK and align the screw holes with the holes located in the back.
- Make sure that the lower edge of the bracket aligns to the lower edge of the KIOSK (See picture below for details)
- Use the Screws (D) to attach the Base plate (A) with the back side of the KIOSK
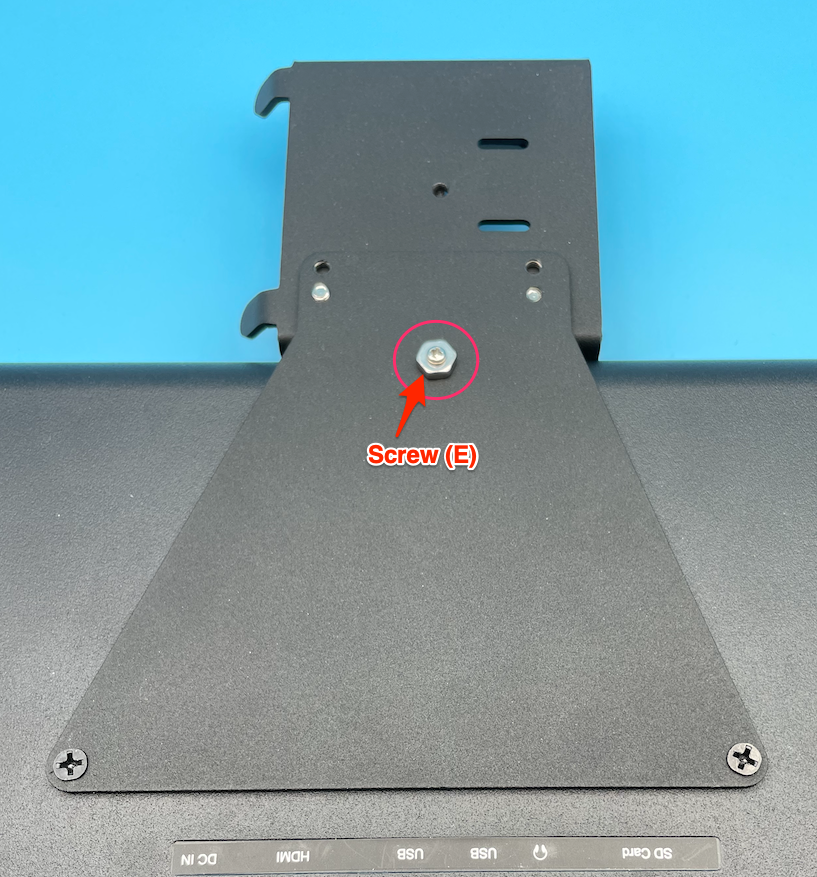
Step 5:
- Use the Screw (E) to further secure the Base Plate (A) with the KIOSK
- Note: Screw (E) might need to be tighten on an angle due to the curved edge on the back of KIOSK
- Make sure to put the included nut with Screw (E) to have a tight connection.
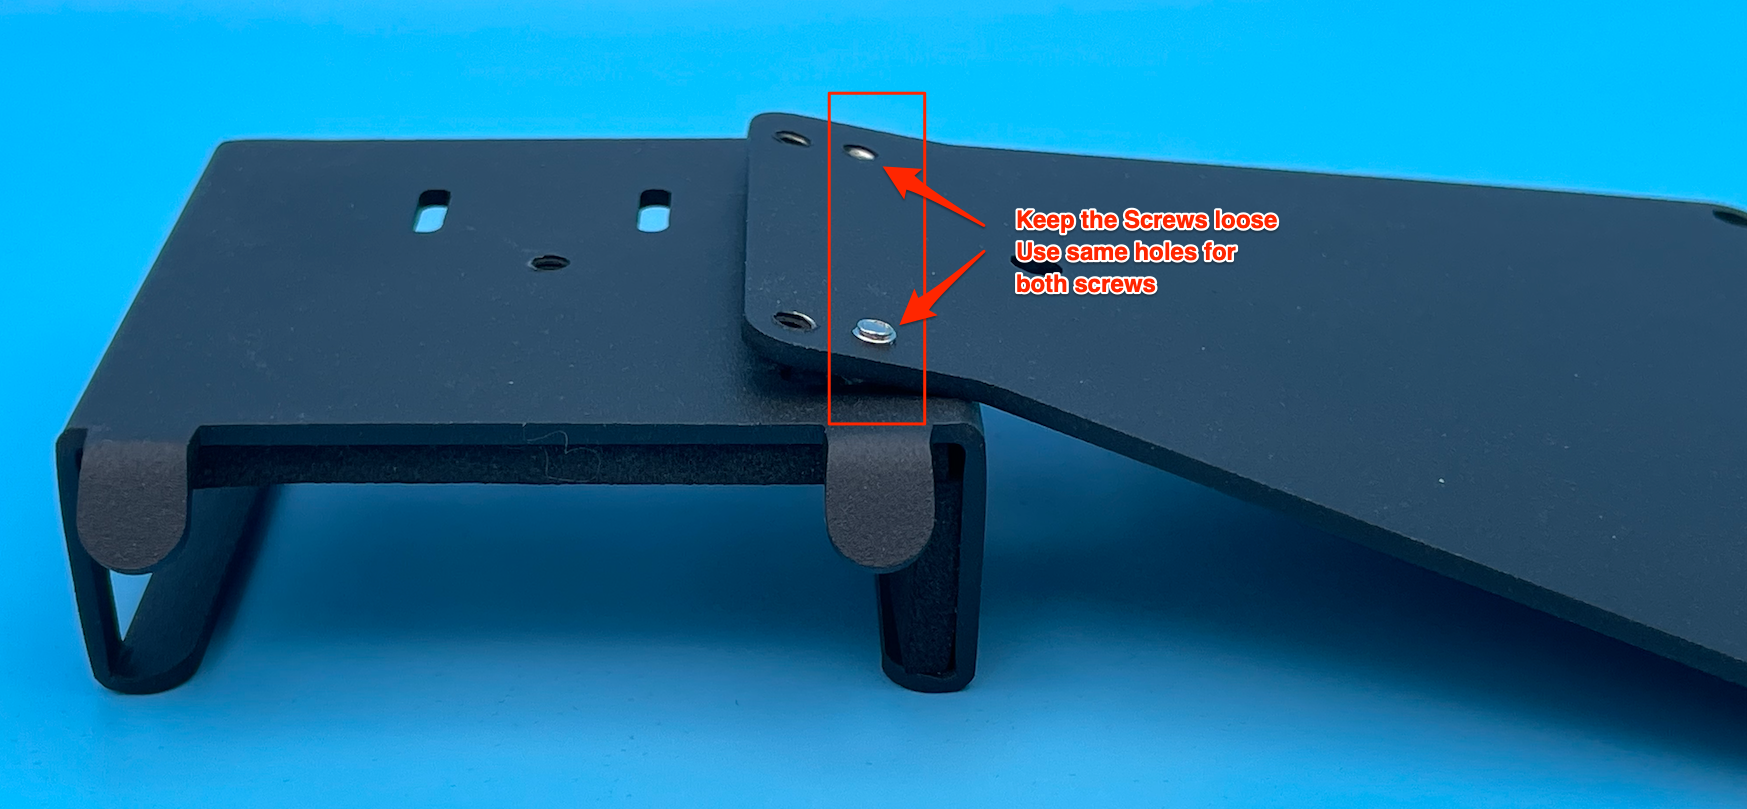
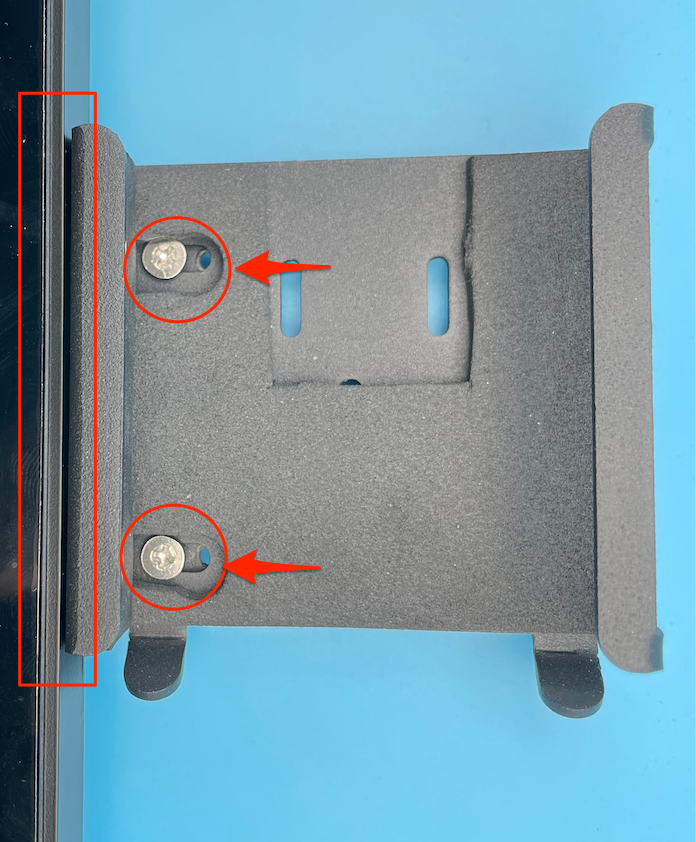
Step 6:
- Flip the KIOSK over so that the Screen is now facing up
- Slide the Bracket (B) towards the KIOSK edge so that there is no gap between the Bracket (B) and the KIOSK edge
- Now tighten the 2 Screws (C) which were kept loose in Step 3.
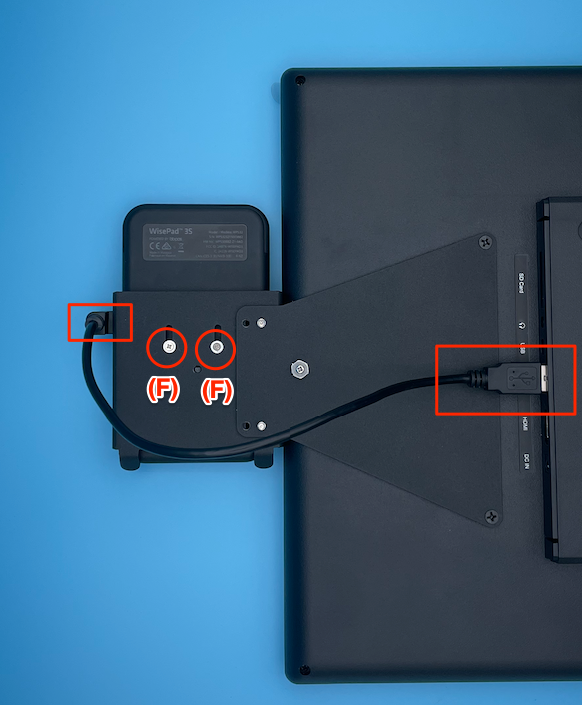
Step 7:
- Flip the KIOSK again so the screen will face down
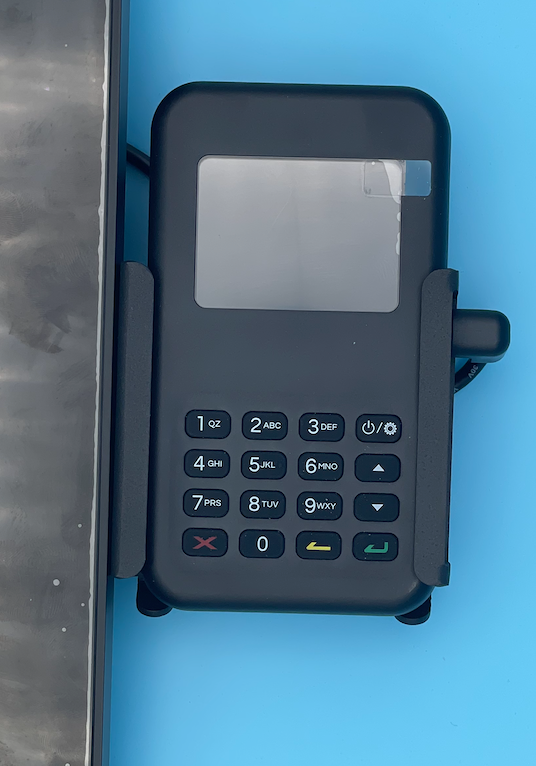
- Slide the WisePad3S PinPad into the Bracket (B)
- Atatch the Pin Pad with the Bracket (B) using the small screws (F)
- Connect the included USB-C cable with the Pin Pad
- Connect the other end of the USB-C cable with KIOSK
Step 8:
- Double tap on the top left corner of the KIOSK's screen
- Login with Admin password
- Go to Settings > Enable EMV Reader
- Click to Submit
Your KIOSK is now ready to be used for Contactless , and EMV Chip based transactions.
Note:
Donot throw the Magnetic strip reader (old card reader) . You can always switch back to old reader , in case of emergency or if the new card reader has any issues for some reason.
- You can also connect the old card reader with PC/Laptop and use it with MOHID Admin dashboard to take in person Credit card based payments
