
Video Tutorial
Step 1: Settings
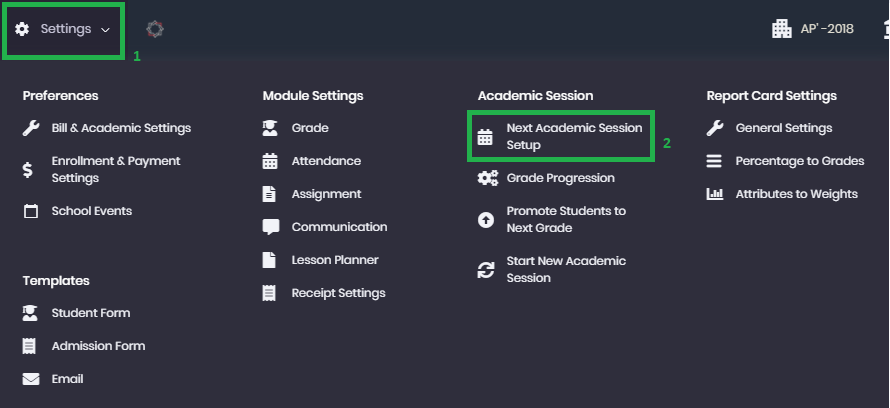
Go to settings on the top left corner
Select next academic session setup from the drop down menu
Academic Session Settings
School’s next academic session
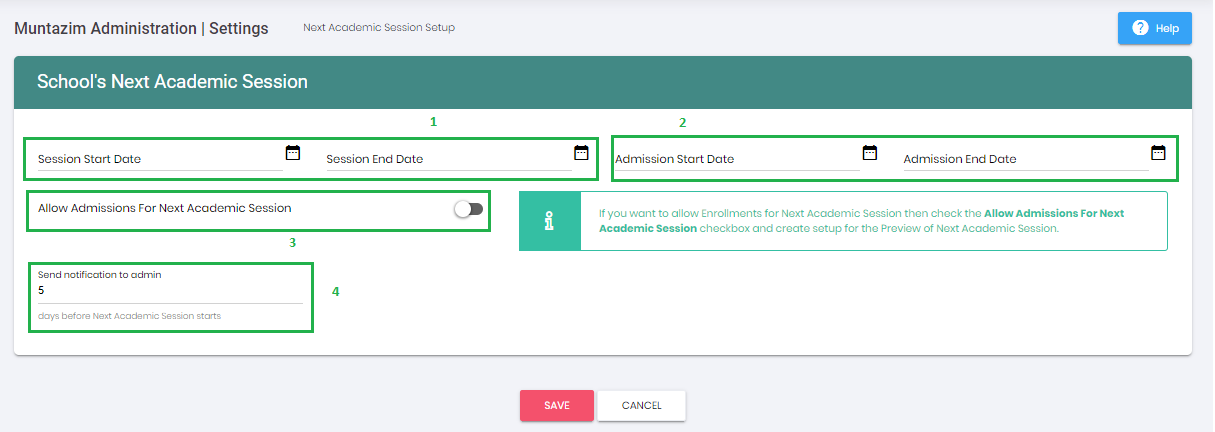
Here the user can see session start and end dates.
New Academic Session Start and End Date: Select date for New Academic Session Start and End.
"Start Date" (This is when classes will actually begin)
"End date" (This is when classes will be end)
Note: "Next Academic Session's Start and End Dates can be set only one time and they will update automatically when next academic session starts"
Admission Start and End Dates: This is the Start and End date for when admissions will be allowed in next grade. Selected dates will be applied to all the grades in the school.
Allow Admissions For Next Academic Session: once the user clicks on this toggle button , admissions in all grades will be permitted for the next session.
If the user wants to allow Enrollments for Next Academic Session then they select the option of Allow Admissions For Next Academic Session and create setup for the Preview of Next Academic Session"
Send Notification to admin before Next Academic Session Starts: It is a reminder for the admin to come and click on the start button when the academic session date reaches to start the new academic session. For example, if the user sets the reminder to 5 then user will be reminded five days prior to the start of the new academic session. (Refer article How to update email template for notification of start of new academic session)
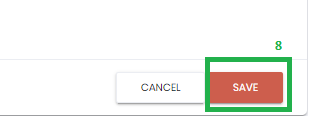
Click on Save button.
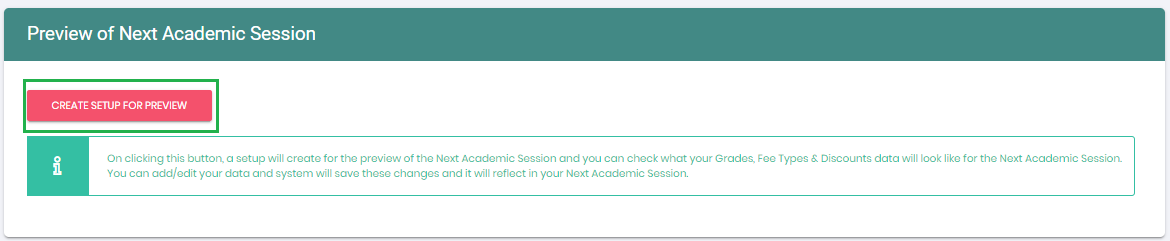
After clicking on the Save button, Option to "Preview of Next Academic Session" will appear. Kindly view the screenshot for your reference
Step 2: Preview of Next Academic Session
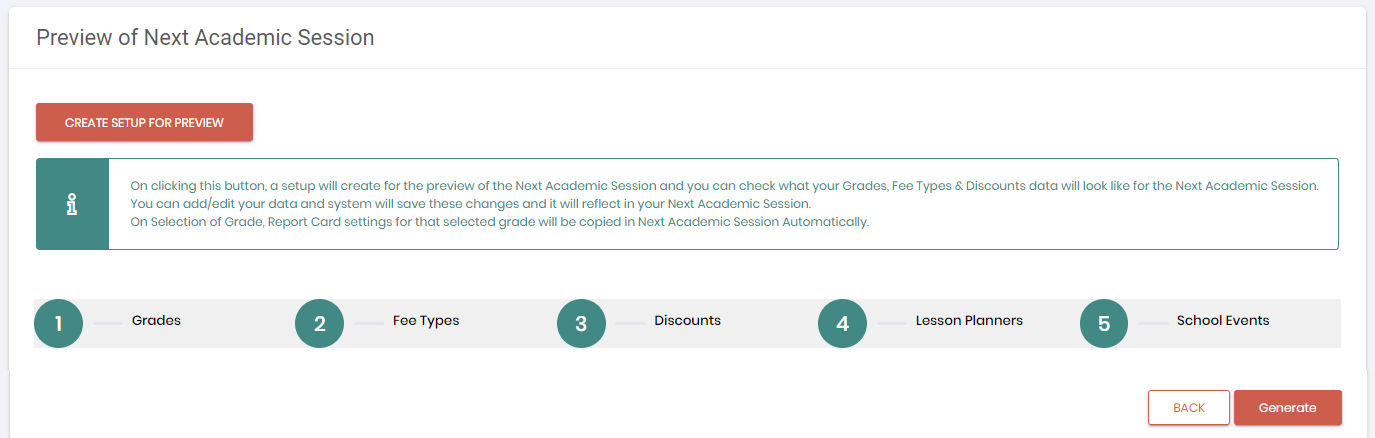
Create Setup For Preview - On clicking this button, a setup will be created for the preview of the Next Academic Session and you can check your overall settings for the next academic session and make changes from this screen if required.
You can edit your data and system will save these changes and it will reflect in your Next Academic Session.
"All changes corresponding to Next Academic Session should be done on this page. These changes does not affect Current Academic Session"
Once clicked on the Create setup for preview button , the system will give users the option of formulating the bill settings in the system. Kindly view the screenshot for reference.
Bill Settings - In these settings the user can formulate the bill settings according to their own convenience.
Billing Period (No. Of Months): In this field the user can define how often their fee invoices will be generated. For e.g. If the user charges fees on a monthly basis then enter 1 in this field.
Bill Generation Date: This is the day (in a month) on which the user wants to generate the fee invoices. For eg if the user wants the bill to be generated on the 5th of every month then they will mention 5 in the specific field.
Due Date for Bill Payment: The user can define the due date (in a month) on which the invoices will be expired. Parents can make payments against these expired invoices till the next invoice generation date.
No. Of Billing Cycle(s): Enter the no. of months here that define the school year for which the fee invoices will be generated.
Next Invoice Generation scheduled on: Once you set this date, it will automatically change from that time onward and will generate invoices according to this date which you will set. In case you want to make changes to this date, there is a CAUTION for that: Contact your system administrator if you are unsure about this date.
The user has to fill the required information as per their requirements and then Save.


Step 3: Grade progression and promoting students to new grades
Note:
- Once the above settings are done and the next academic session start date reaches the next step is to promote the existing students into progressive grades:
- Students must be promoted before proceeding to start new academic session. If students are not promoted before starting next session then they have to be enrolled one by one and admin will not have an option to promote the students.
How to setup grade progression
How to promote students for next academic session
Step 4: Start New Academic Session:
All the above settings are done and now when the session start date (which the user set up in the first step) reaches this button in the screenshot below appears, you have to click on Start New Academic Session:
Go to settings on the top left corner
Click on start academic new session from the drop down menu

Once the user clicks on Start New Academic Session the current session will be replaced by the new session setup.

Now users can further do enrollments manually or through online application form.
Step 5: Enrollments
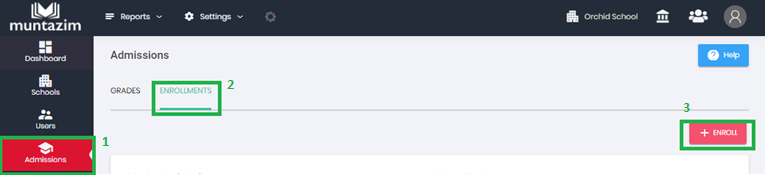
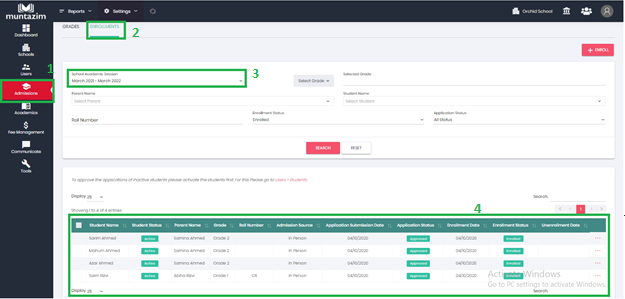
Go to Admissions on the left hand side
Click on the enrollments tab
Click on the enroll button
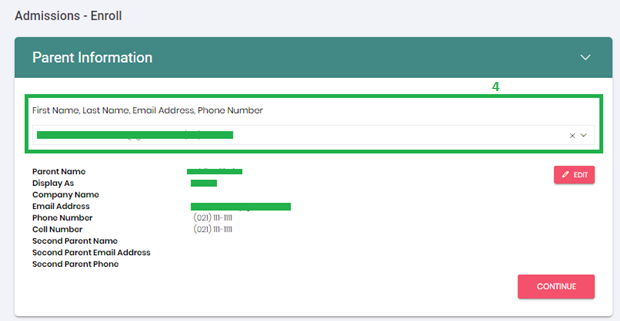
Select the Parent Name
After selecting the name click on continue to proceed further .
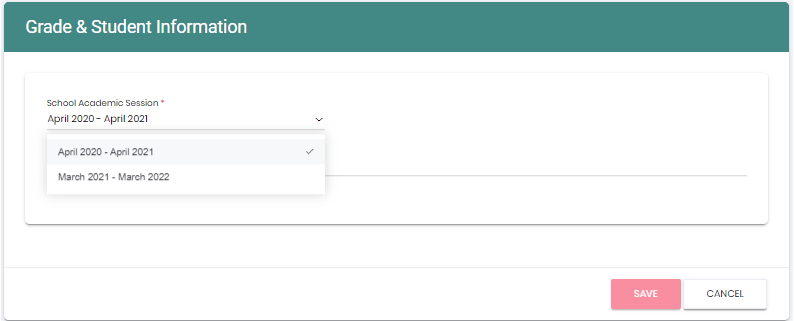
- The user then selects the grade in which the user wants to enroll the student for the next academic session.
- Select the students that need to be enrolled
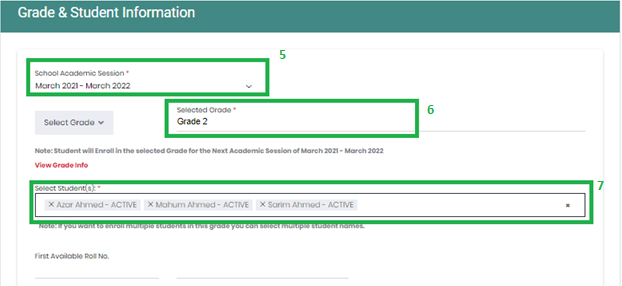
- Fill in the admission form requirements
- Once completed, click on Save in order to save your settings.
User can view the message display on screen that "Enrollments for this Grade is in Next School Session
By clicking on save ,the enrollment application will be submitted, if the Bypass Approval process from enrollment is checked, the system will approve the application and Student will be enrolled in the selected grade. If not then the user needs to approve the student application from the list of all application and enrollment screens.
In Order to check New Year enrollments, users need to select Required Year from Drop-down.
Step 6: Payment & Invoices Of New Academic Session
Process will remain the same for invoice generation, If you have associated Immediate fee type with enrollment, then as soon as student is enrolled, the system will generate Invoice for the same.
- Go to Fee Management
- Fee Payments > List All Invoices
- Select School Academic Session form the drop down list and Search.
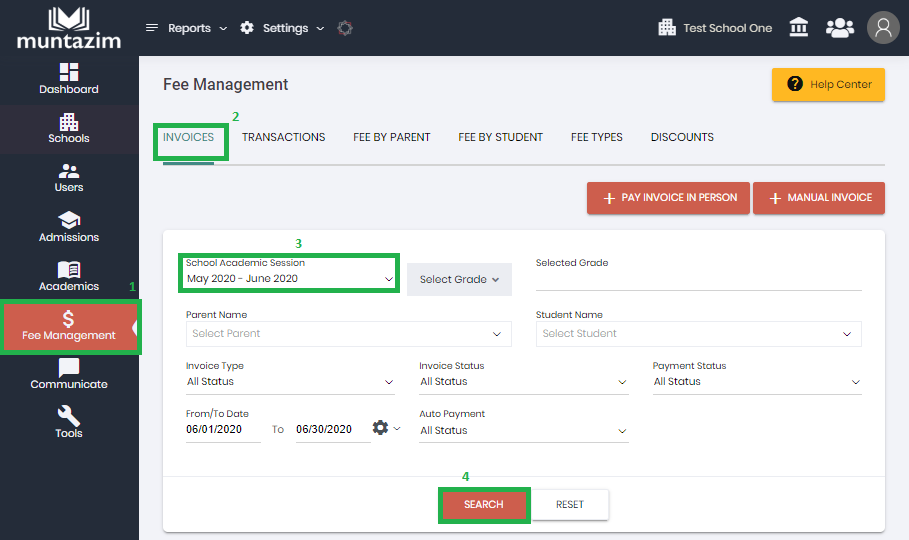
- All invoices will display on that screen.

- In order to make payment please refer to the article below,