A teacher/admin can add a subject's lesson plan by following the below steps. Depending on the admin's settings, the planner will either be published to the parents or it will be submitted to admin for approval. When the lesson plan is published then the parents will be able to view it on parent portal.
Note: Please make sure that only one lesson plan is added for each subject of the grade.
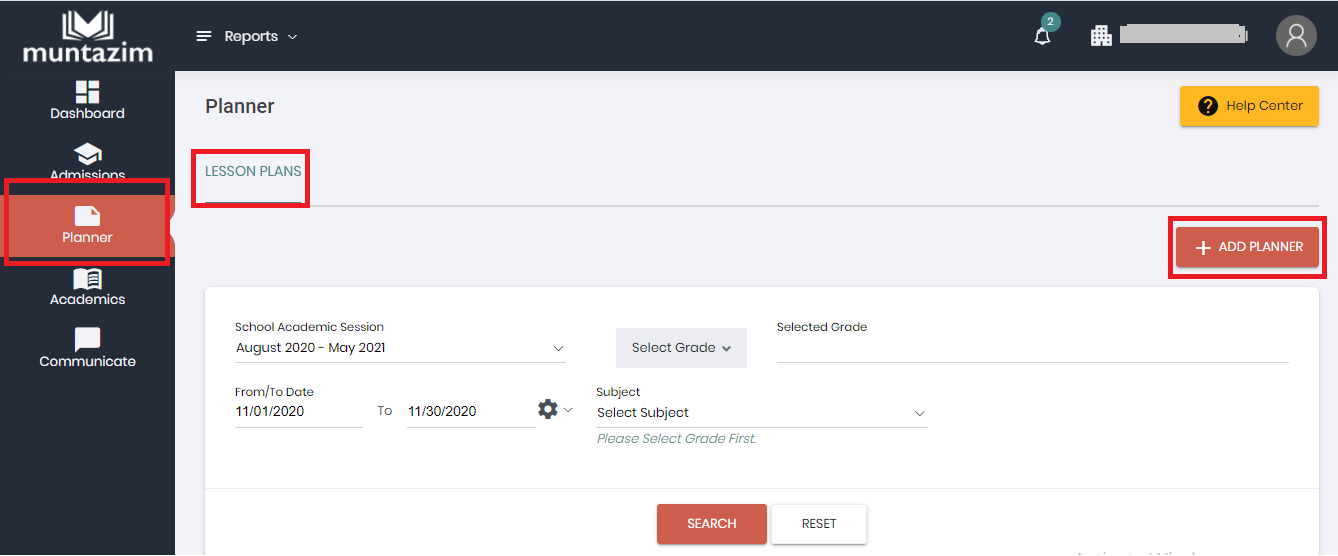
Step # 1: ADD LESSON PLAN
- Go to Planner
- Click on "ADD PLANER"
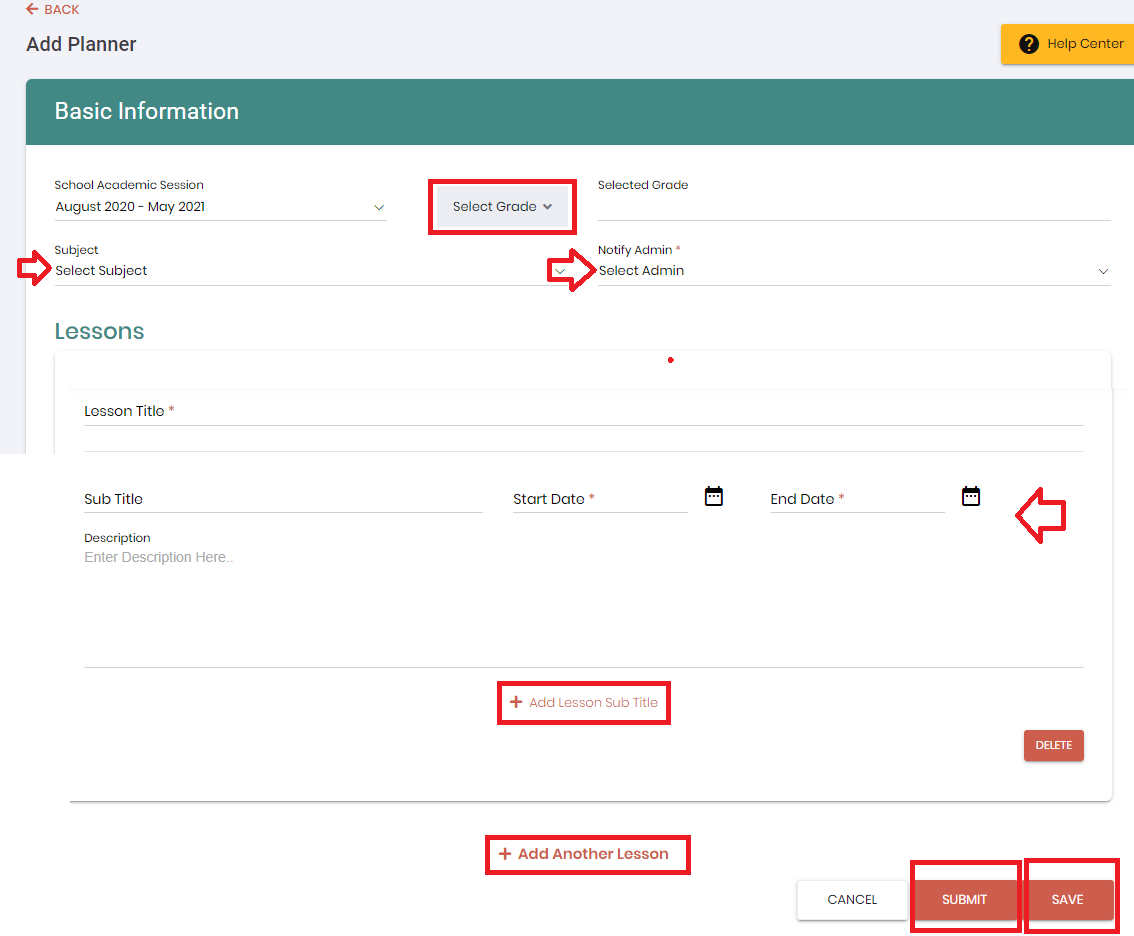
- "Select Grade"
- Once grade is selected, system will display selected grade's subject(s).
Note: Please add only one lesson plan for each subject of the grade.
- Teacher's have to select admin's email address to send them notification from "Notify Admin" option drop-down.
- Enter the required information of the lesson.
- Also, sub title for the lesson plan can be added by clicking on "Add lesson sub title"
- On the same screen teacher can add another lesson plan by clicking on "Add another lesson", for the same grade's subject.
- On clicking "Save" the lesson plan will be saved in draft status.
- On clicking "Submit" the lesson plan will be submitted in "Pending Approval" status when admin has turned off the auto-approval process. However, if auto approval is ON and "Submit" button is clicked then the lesson plan will appear in Approved status.