An admin/teacher can add a subject's lesson plan by following the below steps. Depending on the admin's settings, the planner will either be published to the parents or it will be submitted to admin for approval. When the lesson plan is published then the parents will be able to view it on parent portal.
Note: Please make sure that only one lesson plan is added for each subject of the grade.
Step # 1: LESSON PLANNER SETTINGS
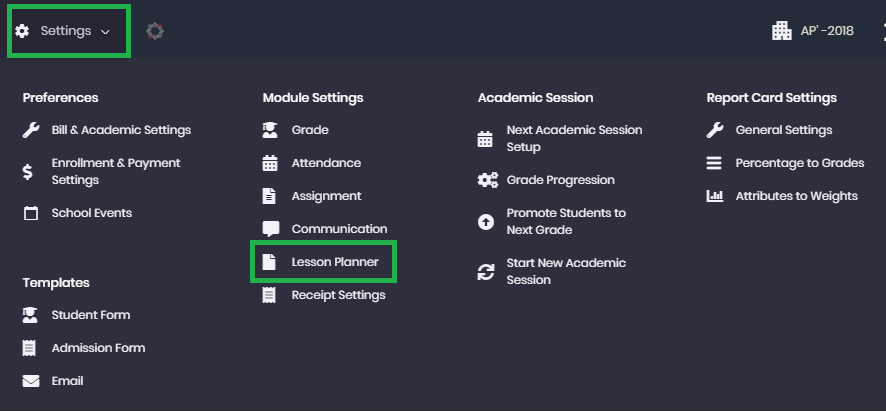
- Go to Settings > General Settings > Lesson Planner Settings. Please enable/disable the options as required.
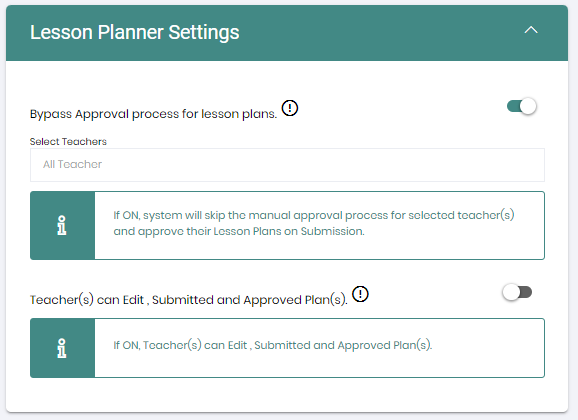
- If the option "Bypass Approval process for lesson plans" is enabled then system will skip the manual approval process and directly approve lesson plans on submission. These approved lesson plans will be published on Parent Portal.
- If the option "Bypass Approval process for lesson plans" is disabled then system will ask the admin to approve lesson plans are saved as draft and pending approval.
- If the option "Teacher(s) can edit submitted and approved plan(s)" is enabled then teacher(s) can edit the submitted and approved plan(s).
- Click on Save
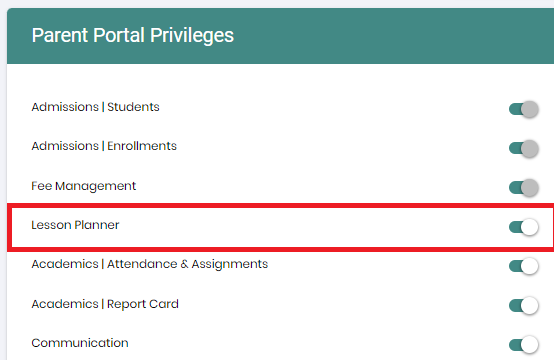
Step # 2: ENABLE LESSON PLAN FOR TEACHERS AND PARENTS
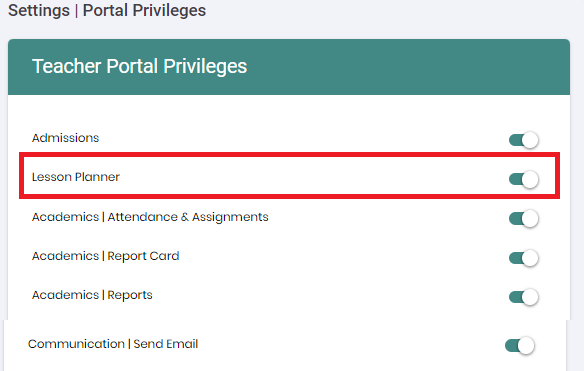
- Go to, Settings > Portal Privilege's
- Enable "Lesson Planner" for teachers and parents
- Click on Save button
Step # 3: ADD LESSON PLAN
- Go to, Planner
- Click on "ADD PLANER"
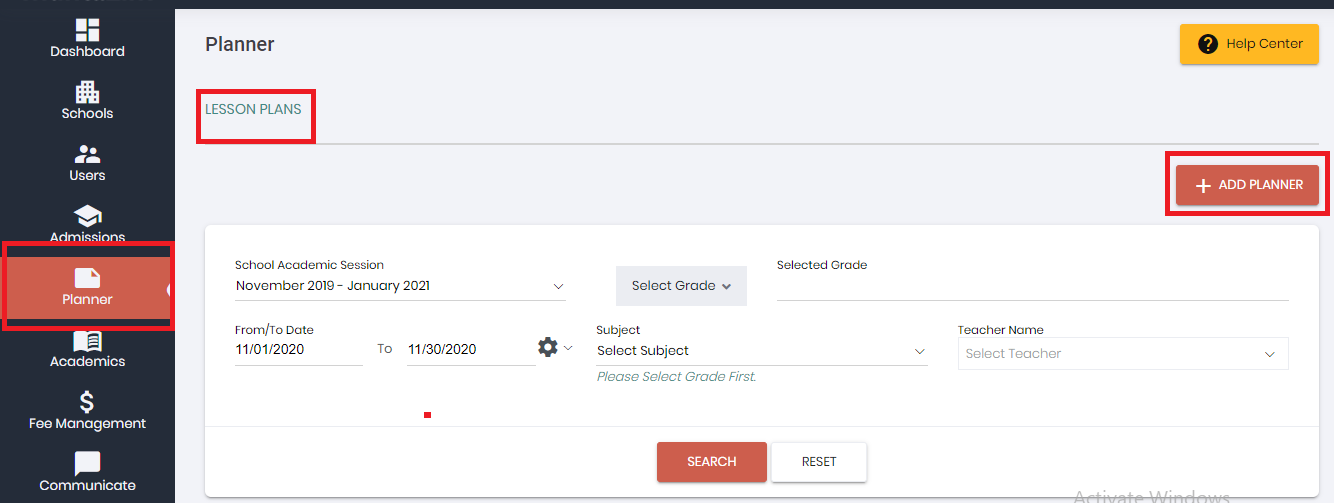
- "Select Grade"
Note: Please make sure that only one lesson plan is added for each subject of the grade.
- Once grade is selected, system will display selected grade's subject(s).
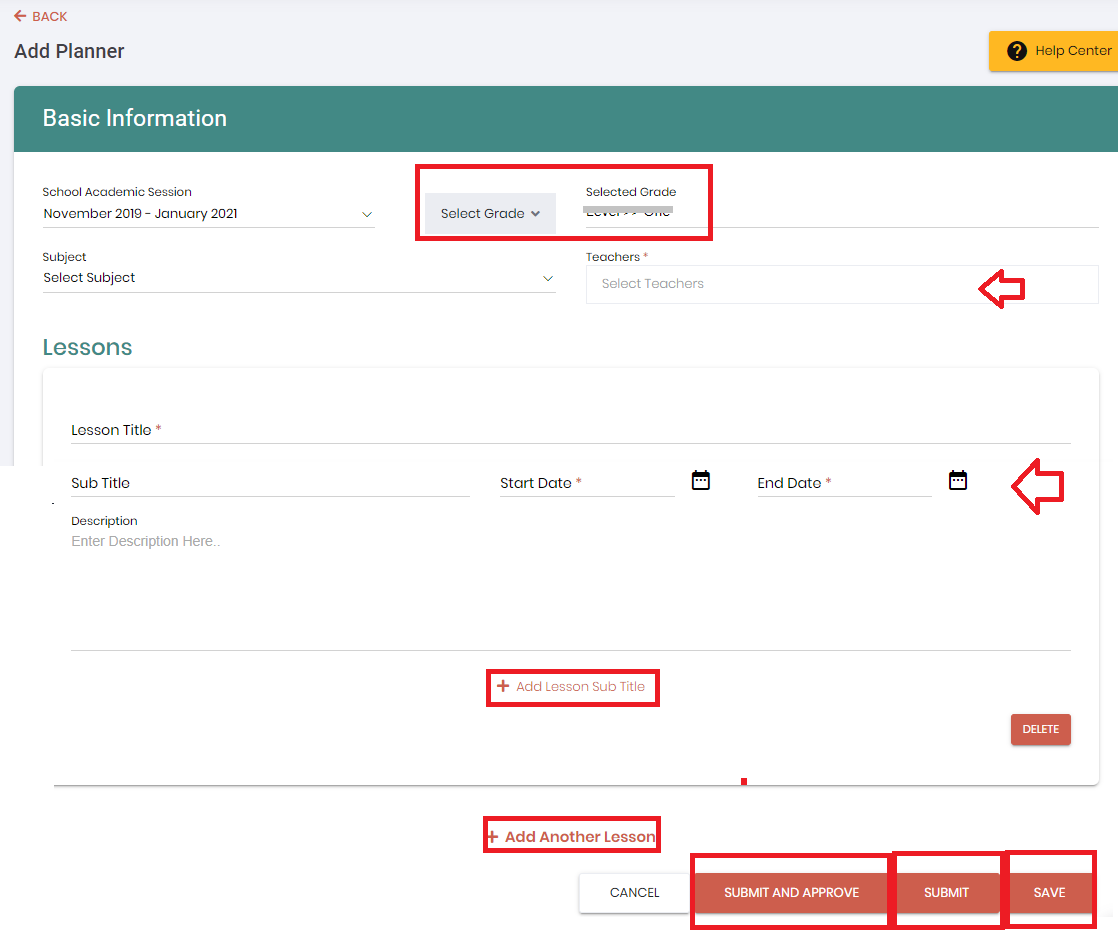
- Admin's have to select teacher's name under "Teachers" field option so that the lesson plan will be displayed on selected teacher(s) portal.
- Enter the required information of the lesson.
- Also, sub title for the lesson plan can be added by clicking on "Add lesson sub title"
- On the same screen admin can add another lesson plan by clicking on "Add another lesson", for the same grade's subject.
- On clicking "Save" the lesson plan will be saved in draft status.
- On clicking "Submit" the lesson plan will be submitted but in pending approval status.
- On clicking "Submit and Approve" the lesson plan will be submitted as well as approved with approved plan status.

Step # 4: PUBLISH LESSON PLAN ON PARENT PORTAL:
- Go to, Planner
- Click on the three dotted icon for the planner that needs to be published on the parent portal
- Select "Publish" option

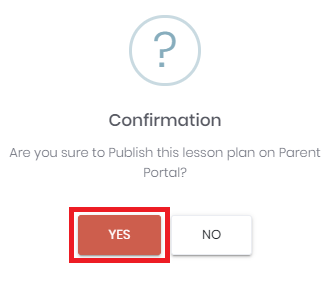
- Confirmation message will be displayed
- Click on "Yes"