
The Chart of Account is the backbone of your financial book. This is the first thing you need to setup in financial module. In Mohid, there are 4 levels that define each account.
1. Account Head
2. Account Type.
3. Account Sub-type
4. Account Name
On Dashboard, click on Financials
> COA (chart of account) > Add Account
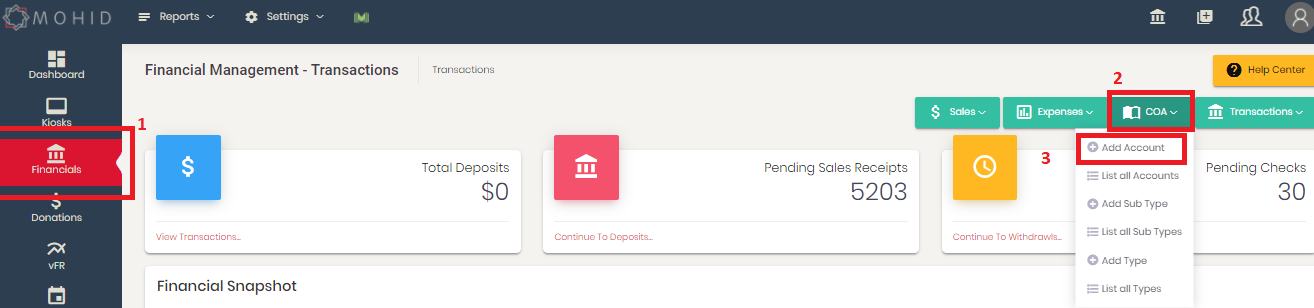
- Select Account Head e.g. Income
- Click on Account Type and
select any default or predefined Account Type e.g. Donation
OR
- Click on "Quick Add"
to add more types if you want to add more type e.g. Operations
- Click on Account
Sub-Type and select any default or predefined Account Sub-Type e.g.
Other Donation
OR
- Click on "Quick Add"
to add more Sub Type e.g. Ramadan Expenses
- Enter Account Name e.g.
Iftaar Expenses
- Optional: Account Mapping :
If you want to sync your accounts with Quick Book, Add the QB relative account
hierarchy e.g. Same Account in QB is defined as Income:Donation:Ramadan Expense
- You need to add this hierarchy in Account Mapping Field
- Click Save

Note: You can use any "Income
Account" as your expense account as well if you want to use one account
for credit and debit. You need to associate that income account to expense
category in Account Association. Please see how to create expense category and
how to associate accounts in account association section
Please follow the above procedure to
create Assets, Expense, Liability and Equity Accounts.
Once you create all accounts, your
chart of account is ready and now require Account Association that can be done
after you create donation and expense categories.